The Labor Day weekend is officially over, and reality has set in. The back-to-school morning rush is back in full swing. If you are a parent, you know the ultimate daily struggle: figuring out what to pack in your child’s lunchbox that is fast, affordable, and that they will actually eat.

If you have a picky eater, you probably rely heavily on store-bought Smucker’s Uncrustables. Kids love them! But at over $1 per sandwich, buying boxes of these frozen treats every week will completely destroy your grocery budget, not to mention they are packed with high fructose corn syrup and preservatives.
What if I told you that you could meal-prep an entire month’s worth of healthy school lunches in just 15 minutes, using a simple drinking glass?
If you are endlessly searching Pinterest for the best lunch box ideas for kids and brilliant picky eater lunch box ideas, this is your holy grail. Today, I am sharing the professional “Glass Cup Seal” hack and the “Peanut Butter Barrier” secret that guarantees your DIY Uncrustables will survive the freezer and never get soggy in a bento box lunch for kids!
👉 Looking for a fun, healthy snack to pack alongside this sandwich? Try my [5-Minute Healthy Apple Nachos (No-Brown Secret!)]!
🌟 Why You Will Love This Recipe
- Massive Money Saver: A homemade Uncrustable costs about 25 cents to make. You will save hundreds of dollars this school year!
- The “Glass Cup” Hack: No fancy sandwich sealers or plastic gadgets required. You just need a regular drinking cup!
- Healthier Ingredients: You control exactly what goes inside! Use 100% whole wheat bread, natural peanut butter, and low-sugar fruit preserves.
- The Ultimate Meal Prep: Make 20 of these on a Sunday afternoon, freeze them, and your morning lunch-packing routine will literally take 5 seconds.
🛒 Ingredients & The “Allergy” Guide
You only need 3 pantry staples to make lunchbox magic!
- Soft Sandwich Bread: (CRUCIAL: You MUST use extremely soft, fresh bread! Standard white bread, soft whole wheat, or soft honey oat. Do NOT use crusty artisan sourdough, as it will crack and will not seal!).
- Creamy Peanut Butter: (Standard commercial peanut butter works best. School Allergy Note: If your child’s school is a “Nut-Free Zone”, simply swap this 1:1 with SunButter (Sunflower Seed Butter) or Cookie Butter!).
- Your Favorite Jelly or Jam: (Strawberry and Grape are the classic choices!).
🍳 Step-by-Step Masterclass Instructions
Step 1: The “Peanut Butter Ring” Barrier (CRUCIAL!) 🛑
The biggest mistake parents make is putting jelly directly on the bread. As it thaws in the lunchbox, the jelly turns the bread into a soggy, purple, wet sponge!
The Secret: Lay two slices of soft bread flat on your cutting board. Spread a very thin layer of peanut butter in the center of BOTH slices.
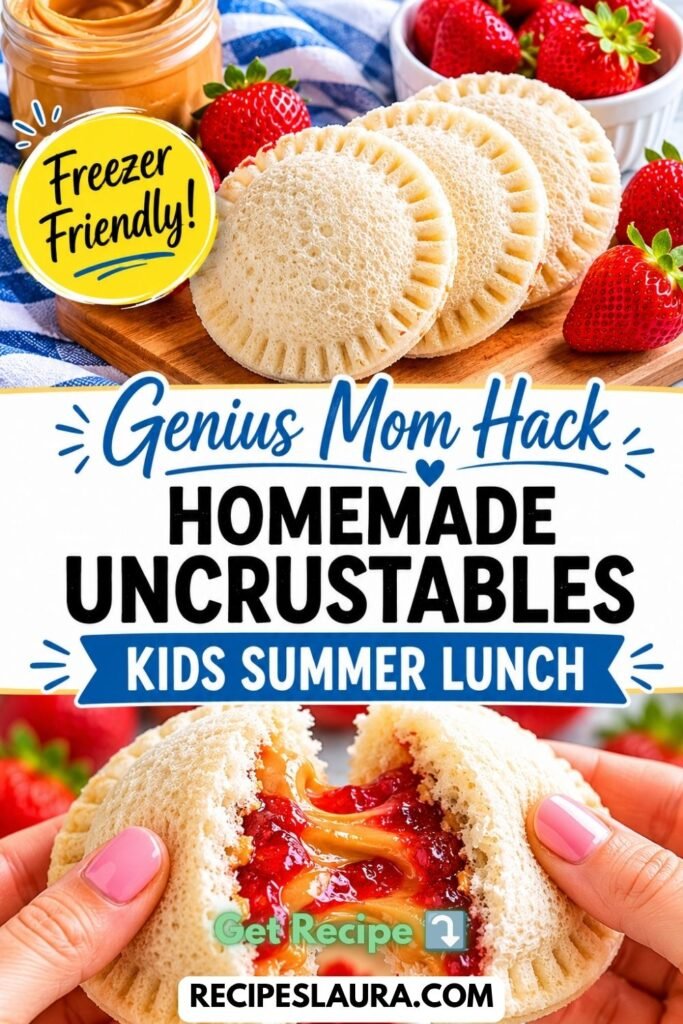
On one slice, pipe a thicker “ring” of peanut butter to create a little wall. Spoon exactly 1 tablespoon of jelly directly into the center of that ring. The peanut butter acts as a waterproof shield, ensuring the jelly NEVER touches the bread!
Step 2: Assemble the Sandwich
Place the second slice of bread (peanut butter side down) directly on top of the jelly slice.
Step 3: The “Glass Cup” Seal Hack 🥛
Grab a standard drinking glass or a wide-mouth mason jar. (The opening should be slightly smaller than the slice of bread).
Place the glass upside-down perfectly in the center of the sandwich. Press down firmly and aggressively, twisting the glass slightly back and forth.
The Magic: The blunt edge of the glass will cleanly cut through the bread, removing the crusts completely, while simultaneously pinching and crimping the soft edges of the bread together! Pull away the crusts, lift the glass, and you have a flawless, sealed, round Uncrustable!
Step 4: Flash Freeze for Meal Prep ❄️
Do not just throw them all in a bag immediately! Place your sealed sandwiches in a single layer on a baking sheet. Place the baking sheet in the freezer for 1 hour.
Once the sandwiches are frozen solid, transfer them to a large Ziploc freezer bag. Squeeze out the air and keep them in the freezer for up to 3 months!
Step 5: The Morning Lunchbox Routine 🎒
It is 7:00 AM. Grab one rock-hard frozen sandwich from the Ziploc bag and pop it directly into your child’s bento box. By 12:00 PM lunchtime, the sandwich will be perfectly thawed, soft, fresh, and ready to eat!
👉 Want another incredible freezer-friendly meal prep idea? Check out my [Make-Ahead Freezer Smoothie Packs]!
♻️ Zero Waste: What to do with the crusts?
Don’t throw those bread crusts away!
- Toss them in a bag in the freezer. When the bag is full, bake them at 300°F until dry, and pulse them in a food processor to make homemade breadcrumbs!
- Or toss them with olive oil, garlic powder, and parmesan, and bake them into amazing salad croutons!