These Chocolate Peanut Butter Protein Bars with Oats & Sea Salt are an easy no-bake snack made with creamy peanut butter, hearty oats, protein powder, dark chocolate, and a light sprinkle of flaky sea salt.
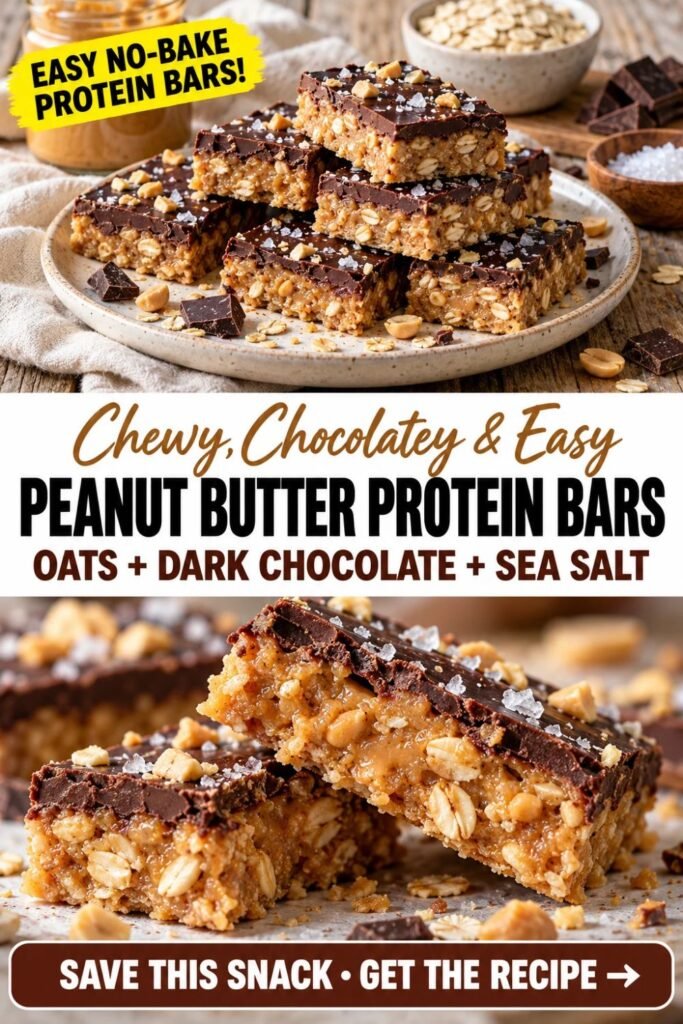
The base is soft and chewy with plenty of peanut butter flavor, while the thin chocolate topping adds richness without making the bars overly sweet.
They are perfect for afternoon snacks, meal prep, lunchboxes, or grab-and-go bites when you want something easy to keep in the refrigerator.
Why You Will Love This Recipe
- No baking is required.
- Peanut butter gives the bars a rich, chewy texture.
- Oats make them hearty and satisfying.
- Dark chocolate adds a rich finish.
- Sea salt balances the sweetness.
- They are ideal for meal prep.
- The bars can be stored in the refrigerator or freezer.
- The recipe is easy to customize with nuts or seeds.
Ingredients
For the Protein Bar Base
- 2 cups old-fashioned rolled oats
- 1 cup creamy peanut butter
- ½ cup vanilla or chocolate protein powder
- ⅓ cup honey or maple syrup
- 2 tablespoons chia seeds or ground flaxseed
- 1 teaspoon vanilla extract
- ¼ teaspoon ground cinnamon
- Pinch of salt
- 2–4 tablespoons milk, as needed
For the Chocolate Topping
- 6 oz dark chocolate
- 1 teaspoon coconut oil or neutral oil, optional
- ½ teaspoon flaky sea salt, or to taste
Optional Add-Ins
- Chopped roasted peanuts
- Mini dark chocolate chips
- Cacao nibs
- Shredded coconut
- Chopped almonds
🍳 Step-by-Step Masterclass Instructions
Yield: 10–12 bars
Prep Time: 15 minutes
Chill Time: 1 hour
Total Time: 1 hour 15 minutes
Step 1: Prepare the Pan
Line an 8-inch square pan with parchment paper.
Leave some parchment hanging over the sides so you can easily lift the bars out later.
Step 2: Combine the Dry Ingredients
Add the rolled oats, protein powder, chia seeds or flaxseed, cinnamon, and salt to a large mixing bowl.
Stir until evenly combined.
Step 3: Add the Peanut Butter
Add the creamy peanut butter.
Use a sturdy spoon or spatula to begin working it into the dry mixture.
Step 4: Add the Sweetener
Pour in the honey or maple syrup.
Add the vanilla extract.
Mix thoroughly until the ingredients begin forming a thick, sticky mixture.
Step 5: Adjust the Texture
If the mixture feels too dry or crumbly, add milk 1 tablespoon at a time.
Continue mixing until the dough holds together firmly when pressed between your fingers.
Masterclass Tip: Different protein powders absorb moisture differently, so add liquid gradually rather than all at once.
Step 6: Add Optional Mix-Ins
Fold in chopped peanuts, chocolate chips, or cacao nibs if desired.
Do not add too many extras or the bars may become difficult to cut cleanly.
Step 7: Press Into the Pan
Transfer the mixture into the prepared pan.
Press it down firmly and evenly using the back of a spoon or the bottom of a measuring cup.
Pay special attention to the corners.
Step 8: Chill the Base
Refrigerate the pan for approximately 20 minutes while you prepare the chocolate topping.
Step 9: Melt the Chocolate
Place the dark chocolate in a microwave-safe bowl.
Heat in 20-second intervals, stirring between each interval, until smooth.
Stir in the coconut oil if using.
Step 10: Spread the Chocolate
Remove the chilled peanut butter base from the refrigerator.
Pour the melted chocolate over the top.
Spread it into a thin, even layer using an offset spatula or spoon.
Step 11: Add Sea Salt
Sprinkle flaky sea salt lightly over the chocolate while it is still soft.
Use a small amount so the salt complements rather than overwhelms the chocolate.
Step 12: Chill Until Firm
Return the pan to the refrigerator.
Chill for approximately 40–60 minutes, or until the chocolate and peanut butter base are firm.
Step 13: Lift From the Pan
Use the parchment paper handles to lift the chilled slab from the pan.
Place it on a cutting board.
Step 14: Cut Into Bars
Use a sharp knife to cut into 10–12 bars.
For cleaner chocolate edges, warm the knife briefly under hot water, dry it completely, then slice.
Step 15: Serve
Enjoy chilled or let the bars sit at room temperature for several minutes before eating.
The finished bars should be chewy, nutty, lightly sweet, rich with dark chocolate, and finished with a subtle salty contrast.
🔒 Storage & Reheating Tips
Refrigerator: Store the bars in an airtight container for up to 1 week.
Freezer: Freeze for up to 2 months in a freezer-safe container.
Prevent sticking: Separate layers with parchment paper.
Serving from frozen: Let the bars sit at room temperature for approximately 10–15 minutes before eating.
Meal prep: Wrap bars individually or portion them into snack containers for easy grab-and-go snacks.
No reheating required: These bars are best eaten chilled or at room temperature.
Chocolate tip: Keep the bars refrigerated in warm weather so the chocolate topping stays firm.
Texture tip: If the bars become very firm in the refrigerator, allow them to rest for 5 minutes before eating.