Hosting Easter brunch or a Spring egg hunt this year? Instead of stressing over baking the perfect, complicated layered carrot cake, I have a secret weapon for you. Create a show-stopping centerpiece that takes exactly 10 minutes to make: The Easter Candy Charcuterie Board.
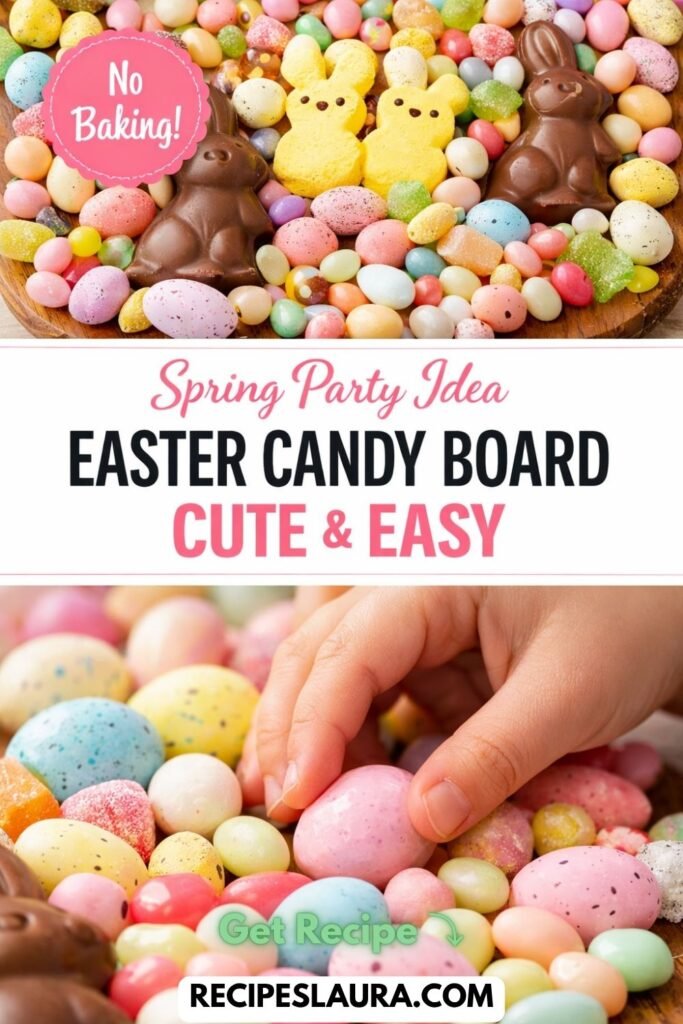
It’s colorful, fun, incredibly aesthetic, and kids (and adults!) will completely obsess over it. The best part? You don’t even have to turn on your oven. This dessert board is all about smart grocery shopping and fun assembly. Grab your favorite pastel treats and let’s build the ultimate Spring dessert platter!
🛒 What You Need (The Easter Shopping List)
To make a dessert board look professional, you need a variety of textures, sizes, and pastel colors. Here is the perfect formula:
- The Anchors (The Big Chocolate):
- 1 or 2 medium hollow Chocolate Bunnies (Lindt Gold Bunnies are perfect here).
- A few large chocolate peanut butter eggs (like Reese’s).
- The Fluff (The Soft Textures):
- Marshmallow Peeps (Yellow chicks and pink bunnies add great pops of color!).
- Pastel-colored mini marshmallows.
- The Crunch (The Salty/Sweet Balance):
- Yogurt-covered pretzels (the white color breaks up the bright candies).
- Graham crackers or vanilla wafers.
- Bonus: Add a few of my [No-Bake Easter Nest Cookies] if you made them!
- The Fillers (The Small Candies):
- Cadbury Mini Eggs (A non-negotiable for Easter!).
- Pastel M&Ms.
- Gourmet jelly beans or pastel gummy bears.
👩🍳 Step-by-Step Assembly Guide
Building a beautiful board is all about layering. Don’t just dump the candy—follow these steps for that “Pinterest-perfect” look:
Step 1: Place Your Bowls First
Take 2 or 3 small ramekins or bowls and place them on your wooden board in a zigzag pattern. Fill these bowls with your smallest candies (like the M&Ms or jelly beans). This creates structure and height.
Step 2: Add the “Stars” of the Show
Place your Chocolate Bunnies directly on the board. I like to put them slightly off-center. They are the focal point, so give them space to shine!
Step 3: Create Candy “Rivers”
Take your marshmallow Peeps and yogurt pretzels and fan them out in curved lines (like a river) flowing around the small bowls and the chocolate bunnies. This creates movement and makes the board look dynamic.
Step 4: The Golden Rule (Fill the Gaps!)
This is the secret that separates a good board from a gorgeous board. No empty wood should be showing! Take your Cadbury Mini Eggs, marshmallows, and remaining jelly beans, and stuff them into every single crack and empty space on the board. Abundance equals luxury!
💡 Pro-Tips for the Best Board:
- Keep it Cool: Chocolate and marshmallows will melt if your house is too warm. Keep the board in a cool spot away from direct sunlight until your guests arrive.
- The Salty Touch: If you want to cut the sweetness, add a handful of lightly salted roasted almonds or regular salted pretzels. The sweet-and-salty combo is always a winner!
- Make it Ahead: You can assemble 90% of this board the night before! Just cover it tightly with plastic wrap so the marshmallows don’t get stale, and leave the unwrapped chocolate bunnies off until right before serving so they don’t get scratched.
Enjoy your stress-free Spring hosting! 🌷