Have you ever ordered a gorgeous rice bowl, a gourmet burger, or artisan street tacos at a restaurant, and noticed they always come topped with those stunning, bright pink, tangy onion slices?
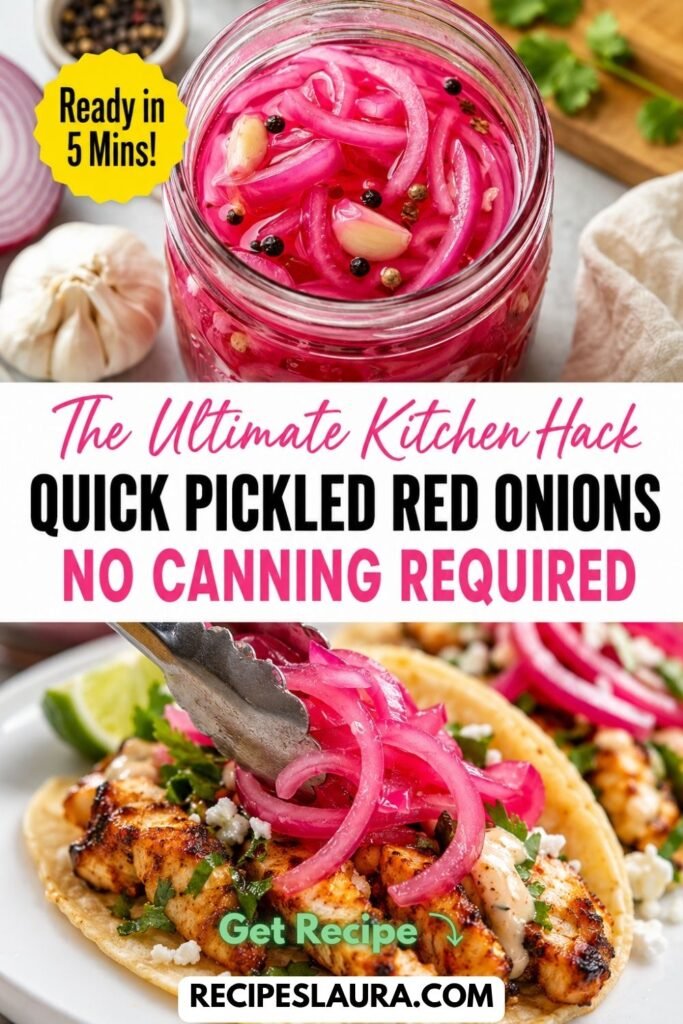
That is the restaurant industry’s favorite cheat code: Pickled Red Onions.
They instantly elevate any dish, adding a massive pop of vibrant color, a satisfying crunch, and a sweet-and-tangy bite that cuts right through rich meats and cheeses. The best part? You don’t need to go to a fancy restaurant to get them.
This 5-Minute Quick Pickled Red Onions recipe is arguably the easiest kitchen hack in the world. There is no complicated canning equipment, no pressure cookers, and no waiting weeks for them to ferment. Using just 4 pantry ingredients, you can make a giant jar of these pink beauties to keep in your fridge all month long!
👉 Looking for the perfect lunch to top with these onions? Try my [Copycat Chipotle Chicken Bowls]!
🌟 Why You Will Love This Recipe
- Ready in 5 Minutes: Slice the onions, boil the brine, pour, and you are done.
- No “Raw Onion” Breath: The hot vinegar brine cooks the onions just enough to remove that harsh, biting raw onion flavor, leaving behind only sweet, tangy crunch!
- Aesthetic Appeal: The natural chemical reaction between the vinegar and the red onion turns the liquid into a stunning, Instagram-worthy neon pink.
- Gut Healthy: Naturally low-calorie, vegan, gluten-free, and great for digestion.
🛒 Ingredients & The “Brine” Guide
You only need 4 core ingredients, plus a few optional aromatics!
The Core Ingredients:
- 1 Large Red Onion: (Must be a red onion to get that beautiful pink color! White or yellow onions will taste fine but will look gray).
- 1 cup White Vinegar: (Or a 50/50 mix of white vinegar and Apple Cider Vinegar for a fruitier, more complex flavor).
- 1 cup Water.
- 1 tbsp Granulated White Sugar or Maple Syrup: (To balance the harsh acidity of the vinegar).
- 1 ½ tsp Sea Salt or Kosher Salt: (Do NOT use iodized table salt; it will make your brine cloudy).
The Optional Aromatics (Flavor Boosters!):
- 2 cloves Fresh Garlic: (Smashed).
- 1 tsp Whole Black Peppercorns.
- A pinch of Crushed Red Pepper Flakes or a sliced Jalapeño: (If you like a spicy kick!).
🍳 Step-by-Step Masterclass Instructions
Step 1: Slice the Onions Paper-Thin 🔪
Peel your red onion and slice it as thinly as humanly possible. Pro Tip: Use a mandoline slicer set to the 1/8-inch setting. Slicing them paper-thin ensures they absorb the pickling liquid instantly and remain delicate to chew!
Step 2: Pack the Mason Jar
Stuff the sliced red onions tightly into a clean, 16-ounce glass mason jar. If you are using aromatics (garlic cloves, peppercorns, or jalapeños), tuck them down into the sides of the jar alongside the onions. Pack the onions all the way to the top!
Step 3: Boil the Vinegar Brine 🔥
In a small saucepan, combine the water, vinegar, sugar (or maple syrup), and sea salt. Place over medium-high heat and bring the mixture to a gentle simmer. Stir for about 1 to 2 minutes until the sugar and salt have completely dissolved into the liquid.
Step 4: The “Hot Pour” Secret 🛑
Remove the saucepan from the heat. Carefully pour the hot vinegar brine directly into the mason jar over the packed onions.
Why hot brine? Pouring the hot liquid over the onions slightly blanches them, instantly killing the harsh raw onion bite while keeping them perfectly crunchy. Push the onions down with a spoon to ensure they are completely submerged in the liquid.
Step 5: Cool and Watch the Magic Happen! 🩷
Let the jar sit uncovered on your kitchen counter for about 20 to 30 minutes to cool to room temperature. As they cool, you will watch the magic happen: the dark purple onions will magically turn bright, vibrant pink! Once cooled, screw the lid on tightly and store in the refrigerator.
👉 Need a savory weeknight dinner that screams for pickled onions? Check out my [Loaded High-Fiber Burger Bowls]!
🌮 5 Genius Ways To Use Pickled Red Onions
Once you have a jar of these in your fridge, you will put them on everything:
- Taco Tuesday: The ultimate topping for pulled pork, chicken, or fish tacos.
- Avocado Toast: Layer them over mashed avocado and a fried egg for a cafe-style breakfast.
- Burger Bowls: Adds the perfect acidic bite to a heavy, cheesy burger bowl.
- Sandwiches & Wraps: Tuck them into your turkey wraps for an instant flavor upgrade.
- Potato Salads: Chop them up and mix them into your summer potato or macaroni salads!
🔒 Storage & Shelf Life
- How Long Do They Last? Because these are “quick pickles” and not processed in a water bath canner, they must be stored in the refrigerator. They will stay crunchy and delicious for up to 3 to 4 weeks.
- When Can I Eat Them? You can eat them just 30 minutes after making them, but they taste significantly better and tangier if you let them sit in the fridge overnight!