It is 2:00 PM, you are running errands with the kids, and you pull into the Starbucks drive-thru for an afternoon iced coffee. Immediately, the begging begins: “Can I get a pink cake pop please?!”
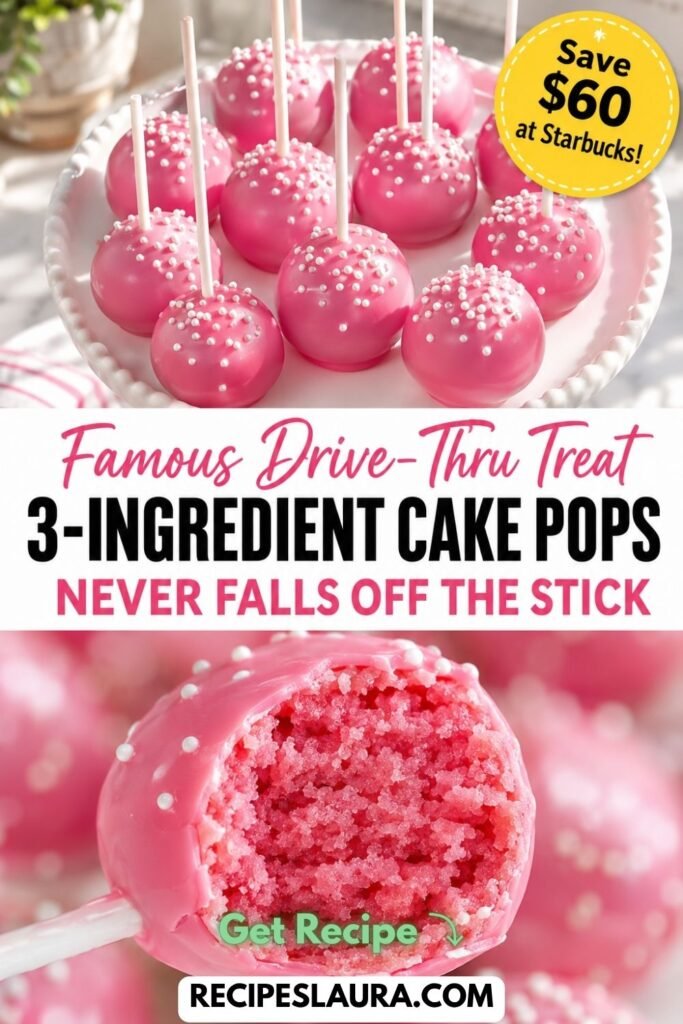
We all love the famous Starbucks Birthday Cake Pops. They are dense, incredibly moist, and covered in a satisfying chocolate shell. But at nearly $3.50 for a single bite-sized treat, feeding a family (or a summer pool party) will quickly drain your wallet!
What if I told you that you could make 20 cake pops for the price of two?
If you are looking for the absolute easiest cake pops recipe, you have hit the jackpot. Using just 3 simple ingredients, you can recreate that exact iconic dense, doughy texture right in your own kitchen. Today, I am sharing the professional bakery “Chocolate Glue” hack that guarantees your cake balls will NEVER slide off the stick into your bowl of melted chocolate!
👉 Looking for a refreshing homemade drink to pair with your cake pops? Try my [3-Ingredient Creamy Brazilian Lemonade]!
🌟 Why You Will Love This Recipe
- Massive Money Saver: Make an entire batch for under $10!
- Only 3 Ingredients: A box of cake mix, a tub of frosting, and candy melts.
- The “No-Fall” Secret: A simple 10-second hack ensures your cake pops stay perfectly secured to the stick.
- Fun Kids Activity: This is the ultimate interactive summer afternoon kitchen project to do with children.
🛒 Ingredients & The “Candy Melt” Guide
- 1 Box (15.25 oz) Vanilla or White Cake Mix: (Plus the ingredients listed on the box: usually eggs, water, and oil. Want it extra authentic? Use Strawberry Cake Mix for the classic pink color!).
- ⅓ cup Vanilla Frosting: (Store-bought canned frosting works perfectly! Do NOT use the entire tub, or your cake pops will be too wet and greasy).
- 2 bags (12 oz each) Pink Candy Melts: (Candy melts are specifically designed to melt smoothly and harden into a perfect, crisp shell. Do not use regular chocolate chips, as they require tempering!).
- White Sprinkles: (For that iconic Starbucks look).
- Equipment: 20 to 25 Paper Lollipop Sticks, and a Styrofoam block (or an empty cardboard box with holes poked in it) to hold the pops while they dry.
🍳 Step-by-Step Masterclass Instructions
Step 1: Bake and Crumble
Bake your cake in a 9×13 pan according to the package directions. Let it cool completely to room temperature. Once cooled, use your hands to destroy the cake! Crumble the entire cake into a large mixing bowl until it resembles fine sand with no large chunks.
Step 2: The “Binder” Phase
Add exactly ⅓ cup of vanilla frosting to your cake crumbs. Use your clean hands to knead and mix the frosting into the crumbs.
How to test it: Roll a small ball in your palm. If it holds its shape perfectly like play-dough without cracking, it is ready! (If it cracks, add 1 more tablespoon of frosting).
Step 3: Roll and Chill ❄️
Roll the mixture into tightly packed, uniform balls (about 1 tablespoon each) and place them on a parchment-lined baking sheet. Place the baking sheet in the refrigerator for 2 hours (or the freezer for 30 minutes) until they are very firm.
Step 4: The “Chocolate Glue” Hack (Crucial!) 🛑
This is the secret to preventing the cake balls from sliding off the stick!
Melt a small handful of your pink candy melts in a microwave-safe mug. Take a lollipop stick, dip the tip (about ½ inch) into the melted chocolate, and then immediately insert it halfway into a chilled cake ball.
Repeat for all cake balls. Put them back in the fridge for 15 minutes. The chocolate will harden inside the cold cake, acting as cement glue that locks the stick in place!
Step 5: Melt and Dip 🍭
Melt the rest of your pink candy melts in a tall, narrow glass or mug (this makes dipping much easier!).
Take a cake pop by the stick and plunge it straight down into the melted chocolate until it meets the stick. Pull it straight up. Do not swirl it around!
Gently tap your wrist holding the stick with your other hand to let the excess chocolate drip back into the cup.
Step 6: Decorate and Set
While the chocolate shell is still wet, quickly add a few white sprinkles. Stick the bottom of the lollipop stick into your styrofoam block so the cake pop stays perfectly upright while the chocolate hardens (takes about 5 minutes at room temperature).
👉 Need a quick, savory dinner tonight after your baking session? Check out my [30-Minute Unstuffed Peppers Skillet]!
🎨 3 Amazing Cake Pop Flavor Ideas
Bored of basic vanilla? The best part about this recipe is endless customization. Try these cake pop flavor ideas:
- Double Chocolate Fudge: Use devil’s food cake mix, chocolate fudge frosting, and dark chocolate candy melts.
- Red Velvet Truffle: Use red velvet cake mix, cream cheese frosting, and white chocolate candy melts.
- Lemon Burst: Use lemon cake mix, lemon frosting, and yellow candy melts. Perfect for summer!
🔒 Storage Instructions
- Room Temperature: Store finished cake pops in an airtight container at room temperature for up to 3 days (if they last that long!).
- Refrigerator: They will stay incredibly moist in the fridge for up to 1 week. The cold actually makes the inside texture even fudgier!