August is officially here, and the back-to-school panic is beginning to set in. As parents, we all want to pack healthy school lunch ideas that give our kids sustained energy for the classroom. But let’s be real: if it looks too “healthy,” it usually comes back home at 3:00 PM completely untouched.
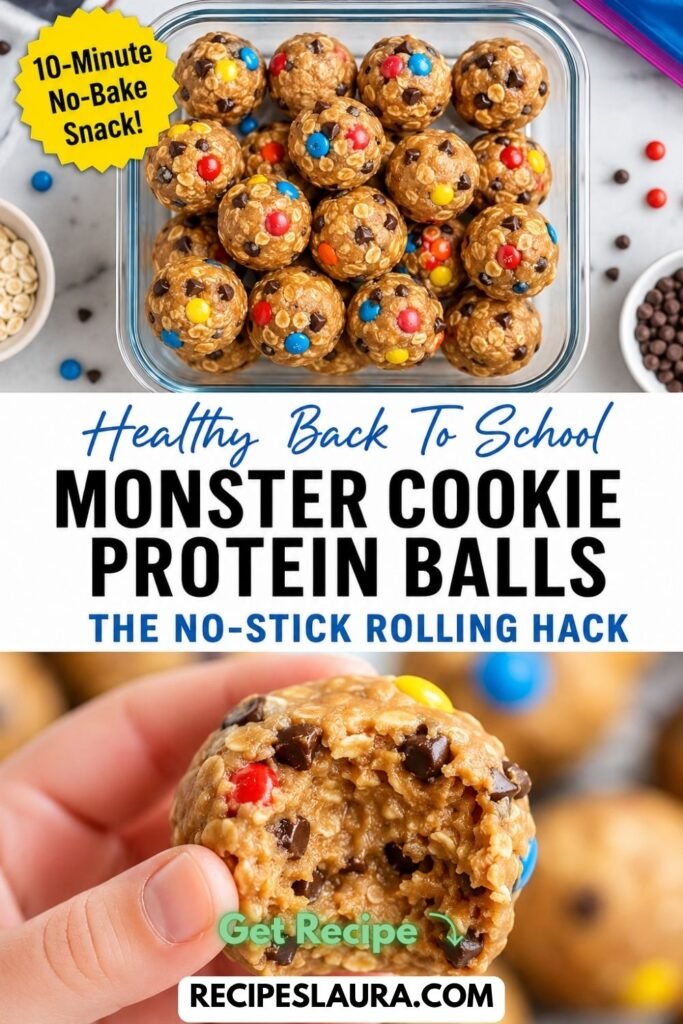
Enter the ultimate lunchbox Trojan Horse: Monster Cookie Protein Balls (also known as Energy Bites!).
If you are endlessly searching Pinterest for fun kids food that won’t cause a massive sugar crash, this 10-minute, no-bake recipe is your holy grail. These bite-sized treats look and taste exactly like a decadent Monster Cookie dough, thanks to the colorful mini M&M’s and chocolate chips.
But secretly? They are packed with heart-healthy rolled oats, protein-rich peanut butter, and fiber-loaded chia seeds. Stop spending $6 on a box of processed, sugary granola bars at the grocery store. Today, I am sharing the ultimate Sunday meal prep snack and the professional “Wet Hands” hack that makes rolling these sticky bites a total breeze!
👉 Looking for a fun lunch to pack these with? Try my [Easy Back-to-School Bento Box Meals]!
🌟 Why You Will Love This Recipe
- 100% No-Bake: Keep your kitchen cool! Just mix, chill, and roll.
- Massive Money Saver: Makes over 20 protein balls for a fraction of the cost of store-bought protein bars.
- Sustained Energy: The combination of complex carbs (oats) and healthy fats (nut butter) keeps kids full until dinner.
- Freezer-Friendly: You can prep a month’s worth of after-school snacks in just 10 minutes.
🛒 Ingredients & The “Allergy-Friendly” Guide
You likely already have every single ingredient sitting in your pantry!
- 1 ½ cups Old-Fashioned Rolled Oats: (Do not use quick oats, as they will turn into mush! You want the chewy texture of rolled oats).
- ⅔ cup Creamy Peanut Butter: (Standard commercial peanut butter like Jif or Skippy works best to bind the dough. School Allergy Note: If your child’s school is nut-free, swap this 1:1 with SunButter!)
- ⅓ cup Pure Honey or Maple Syrup: (This acts as the sticky “glue” holding the oats together).
- 1 tbsp Chia Seeds or Ground Flaxseed: (Invisible to kids, but packed with brain-boosting Omega-3s).
- 1 tsp Pure Vanilla Extract & A pinch of Sea Salt.
- ¼ cup Mini Semi-Sweet Chocolate Chips.
- ¼ cup Mini M&M’s Candies: (The “Mini” size is crucial so the balls hold their shape!).
🍳 Step-by-Step Masterclass Instructions
Step 1: The 1-Bowl Mix 🥣
In a large mixing bowl, combine the rolled oats, creamy peanut butter, honey, chia seeds, vanilla extract, and salt. Use a sturdy wooden spoon or a rubber spatula to aggressively mix everything together until it forms a thick, heavy, sticky dough.
(If the mixture seems too dry and crumbly, add 1 extra tablespoon of honey or peanut butter. If it is too wet, add 2 tablespoons of extra oats).
Step 2: Fold in the “Fun” 🔴🔵
Gently fold in the mini chocolate chips and mini M&M’s. Do this last so the colors don’t bleed into the dough!
Step 3: The “Chill” Rule (Do Not Skip!) ❄️
The biggest mistake people make is trying to roll the balls immediately! The peanut butter is too warm and soft.
Cover the bowl with plastic wrap and place the entire bowl of dough into the refrigerator for 20 to 30 minutes. Chilling the dough solidifies the peanut butter and honey, making it infinitely easier to handle.
Step 4: The “Wet Hands” Rolling Hack 💧
Remove the chilled dough from the fridge. Even when chilled, honey and peanut butter are sticky!
The Professional Secret: Run your clean hands under cold tap water and shake off the excess (leave your hands slightly damp). Grab 1 tablespoon of the dough and roll it firmly between your wet palms.
The Magic: The moisture creates a barrier, meaning the dough will form a perfect, smooth ball without sticking to your skin at all! Re-wet your hands after every 3 or 4 balls.
Step 5: Store and Serve
Place the rolled protein balls into a glass meal prep container or a Ziploc bag. They are ready to eat immediately!
🧊 Lunchbox & Storage Tips
- Refrigerator Storage: Store the protein balls in an airtight container in the fridge for up to 2 weeks. They taste incredible when served cold!
- Freezer Stash: For long-term meal prep, freeze the balls in a Ziploc bag for up to 3 months.
- The Lunchbox Trick: Pop two frozen protein balls directly into your child’s lunchbox at 7:00 AM. By noon, they will be perfectly thawed, chewy, and delicious!