It is Friday night, the weekend is here, and your sweet tooth is screaming for a massive slice of rich, dark chocolate cake. But if you are trying to stick to your summer health goals, diving headfirst into a box of traditional brownie mix can leave you feeling sluggish and guilty.
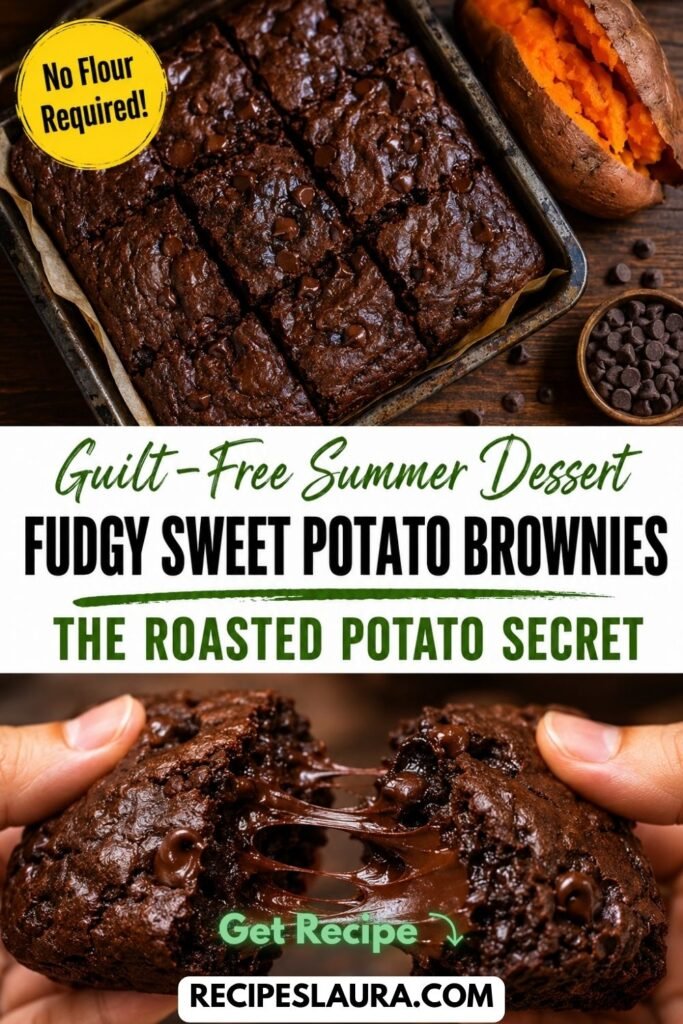
What if I told you that you could eat an incredibly rich, melt-in-your-mouth, fudgy chocolate brownie made entirely from vegetables and nut butter?
Welcome to the magic of Sweet Potato Brownies.
If you are skeptical about putting potatoes in your dessert, prepare to be amazed. When prepared correctly, sweet potatoes act as a miraculous baking binder. They provide natural caramel-like sweetness and an unbelievably gooey texture, completely eliminating the need for refined white flour, butter, or heavy sugars!
If you have tried sweet potato brownies before and they turned out wet, mushy, or tasted like a Thanksgiving side dish, you probably fell victim to the “boiling” trap. Today, I am sharing the professional baker’s “Roasted” secret to ensure your brownies turn out perfectly fudgy and intensely chocolatey every single time!
👉 Looking for another sneaky vegetable dessert? Try my viral [Double Chocolate Chip Zucchini Bread]!
🌟 Why You Will Love This Recipe
- 100% Flourless: Naturally gluten-free, paleo, and easily made vegan!
- Only 4 Main Ingredients: Sweet potatoes, nut butter, cocoa powder, and maple syrup.
- The “Fudgy” Guarantee: These are dense and chewy—not dry or cakey.
- Zero “Veggie” Taste: The dark cocoa powder completely masks the sweet potato flavor. Kids will devour them without a second thought!
🛒 Ingredients & The “Cocoa” Guide
Because this recipe has no flour, the quality of your cocoa powder will dictate the entire flavor of the brownie!
- 1 Large Sweet Potato: (You need exactly 1 cup of mashed sweet potato. See my crucial roasting instructions below!).
- ½ cup Creamy Almond Butter or Peanut Butter: (MUST be natural, drippy nut butter where the only ingredients are nuts and salt. Stiff, processed peanut butter will make the batter too dry).
- ⅓ cup Pure Maple Syrup: (Provides a rich, natural sweetness that pairs perfectly with the potato).
- ½ cup Unsweetened Dutch-Process Cocoa Powder: (Dutch-process cocoa is smoother, darker, and less acidic than regular cocoa. It gives these brownies an intense, Oreo-like richness).
- 1 tsp Pure Vanilla Extract & ¼ tsp Sea Salt.
- ½ cup Semi-Sweet Chocolate Chips: (Dairy-free/vegan chips if preferred).
🍳 Step-by-Step Masterclass Instructions
Step 1: The “Roast, Do Not Boil” Rule (Crucial!) 🛑
The biggest mistake healthy bakers make is boiling or steaming their sweet potatoes! Boiling injects water into the potato, which will make your brownie batter watery, soupy, and impossible to bake through.
The Secret: You MUST roast the sweet potato whole! Preheat your oven to 400°F (200°C). Pierce the sweet potato a few times with a fork, place it on a foil-lined baking sheet, and roast for 45 to 60 minutes until it is incredibly soft and the natural sugars are bubbling out of the skin.
Let it cool, peel the skin off, and mash the vibrant orange flesh with a fork. Measure out exactly 1 cup.
Step 2: Whisk the Wet Ingredients
Turn your oven down to 350°F (175°C). Line an 8×8-inch baking pan with parchment paper, leaving an overhang so you can lift the brownies out easily.
In a large mixing bowl, combine the 1 cup of mashed roasted sweet potato, creamy almond butter, maple syrup, and vanilla extract. Whisk vigorously until the mixture is completely smooth and creamy.
Step 3: Fold in the Dry Ingredients
Place a fine-mesh sieve over the bowl and sift in the ½ cup of Dutch-process cocoa powder and the sea salt. (Sifting prevents bitter lumps of cocoa!).
Use a rubber spatula to gently fold the cocoa powder into the wet mixture. The batter will be extremely thick and sticky—this is exactly what you want!
Step 4: The Chocolate Chip Fold 🍫
Gently fold in most of your chocolate chips, reserving a small handful for the top.
Step 5: Spread and Bake 🔥
Transfer the thick batter to your prepared 8×8 baking pan. Use the back of a wet spoon or an offset spatula to press the batter evenly into the corners and smooth the top. Press the remaining chocolate chips into the top of the batter.
Bake at 350°F for 20 to 25 minutes.
How to test: The edges should look set, but the center will still feel very soft. A toothpick will come out with gooey chocolate on it!
Step 6: The “Deep Chill” Patience Test ❄️
Remove the pan from the oven. Do NOT cut them yet! Because there is no flour or eggs, these brownies need time to set up. Let them cool in the pan at room temperature for 30 minutes, then place the entire pan in the refrigerator for at least 1 hour.
Chilling them creates that iconic, dense, fudgy texture and makes them incredibly easy to slice into perfect squares!
👉 Want to serve a healthy dinner before this guilt-free dessert? Check out my [15-Minute Air Fryer Zucchini Parmesan Chips]!
🔒 Storage & Serving Tips
- Storage: These brownies MUST be stored in an airtight container in the refrigerator. They will stay incredibly fudgy and delicious for up to 5 days.
- The Best Way to Eat Them: They taste phenomenal cold straight from the fridge (like a dense chocolate fudge truffle!), but you can also microwave a square for 10 seconds to get those chocolate chips gooey again.