If you’ve been scrolling through Pinterest lately looking for spring cake inspo, you have definitely seen them. The spring cake aesthetics are completely taking over the internet!
Gone are the days of complicated fondant designs. This year, it is all about pastel buttercream bases covered in adorable, delicate piped daisies. If you are looking for quick spring cakes that look like they came from a high-end boutique bakery, this is the ultimate at home baking project for you.
Whether you need spring cake ideas for Mother’s Day, a baby shower, or a sunny weekend treat, this tutorial will show you exactly how to create those trendy spring cakes flower designs with zero stress. It’s one of the most easy spring cakes you will ever decorate!
🛠️ The Decorating Tools (Keep it Simple!)
You don’t need a massive decorating kit for this spring baking masterpiece. You only need one specific piping tip!
- 1 Layer Cake (6-inch or 8-inch). Pro-Tip: A lemon or vanilla cake fits the Spring vibe perfectly!
- 3 Cups of Stiff Vanilla Buttercream.
- Gel Food Coloring: You need a pastel color for the base (like baby pink, lavender, or mint green) and a bright yellow for the flower centers. Leave some frosting plain white for the petals!
- The Magic Tool: A Small Round Piping Tip (like a Wilton #10 or #12).
- 3 Piping Bags.
👩🍳 Step-by-Step Decorating Tutorial
If you want to make cute spring cakes, the secret is in the temperature of your frosting.
Step 1: The Smooth Pastel Base & CHILL 🛑
Color the majority of your buttercream with your chosen pastel food coloring. Frost your cake as smoothly as possible.
The most important step: Place your frosted cake in the refrigerator for 20 to 30 minutes until the buttercream is cold and firm to the touch. This way, if you mess up a flower, you can easily scrape it off without ruining the base layer!
Step 2: Prep the Flower Colors
While the cake chills, fill one piping bag fitted with the round tip with plain white buttercream. Color a small amount of buttercream bright yellow, and place it in another piping bag (you can just snip a tiny hole in the tip of this bag, no metal tip needed!).
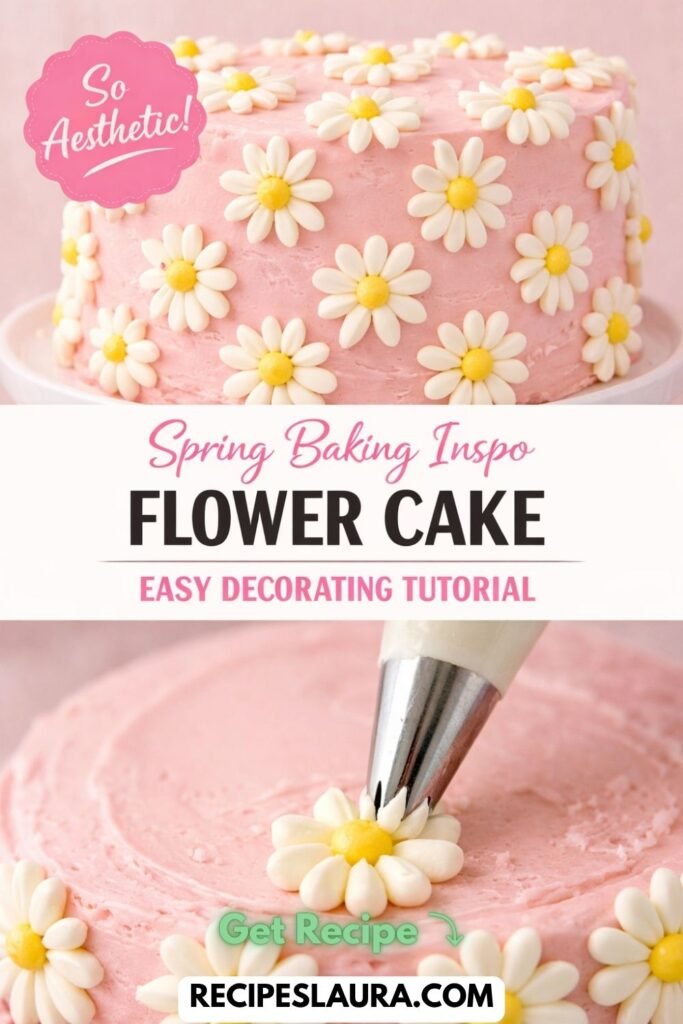
Step 3: Pipe the Petals (The “Dot and Pull” Method)
Take your chilled cake out. Holding your white piping bag at a 45-degree angle, squeeze a dot of frosting onto the side of the cake, and gently pull the bag towards the center to create a teardrop-shaped petal.
Repeat this 5 times in a circle to create a little daisy!
Step 4: The Sunny Center
Take your yellow piping bag and squeeze a perfect little round dot right in the center of your 5 white petals to cover the messy middle. Boom! A perfect daisy.
Step 5: The Aesthetic Placement
To nail that trendy spring cake aesthetic, don’t put the flowers in a perfect line. Scatter them randomly all over the sides and top of the cake. Make some clusters of three, and leave some empty pastel space for a modern look.
💡 Baker’s Secret for Perfect Flowers:
If your kitchen is warm and your white buttercream starts to get too soft, your petals will look mushy. Pop your white piping bag in the fridge for 5 minutes to firm it up! Stiff buttercream makes the sharpest, most beautiful flowers.