August is flying by, and the back-to-school countdown is officially on! While shopping for backpacks and pencils can be stressful, celebrating the first day of school should be pure magic for your kids.
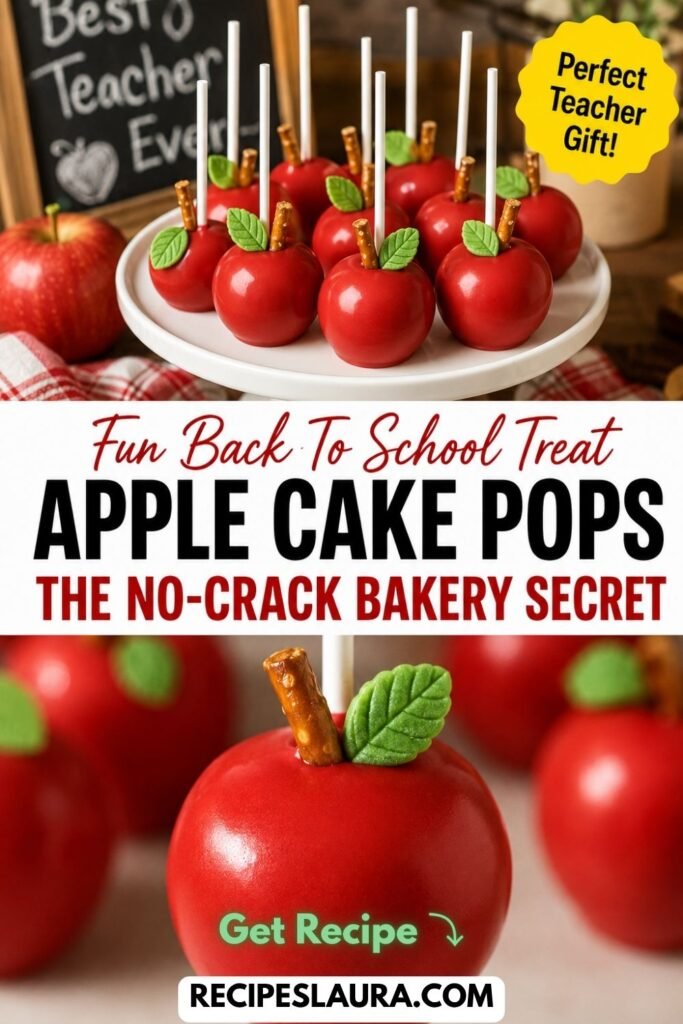
If you are looking for the ultimate fun kids food to celebrate the new school year, you have to make these adorable “Apple” Back To School Cake Pops!
Designed to look like bright, shiny red apples (complete with a tiny pretzel stem and a green leaf!), these bite-sized treats are an absolute showstopper. They are the perfect surprise to tuck into a bento lunchbox, a fun after-school snack, or an incredible DIY gift to give to your child’s new teacher!
If you have tried making cake pops before, you likely ran into the most frustrating baking problem ever: the chocolate shell cracks wide open as it dries! Today, I am sharing the professional “Temperature Shock” bakery secret so your cake pops stay flawlessly smooth and crack-free every single time.
👉 Looking for a healthy lunchbox snack to prep? Try my [10-Minute Monster Cookie Protein Balls]!
🌟 Why You Will Love This Recipe
- The Ultimate Teacher Gift: Wrap one in a little cellophane bag with a ribbon for the perfect “Welcome Back” gift.
- Super Fun Presentation: They look exactly like mini apples but taste like decadent, fudgy cake truffles.
- The “No-Crack” Guarantee: Learn the temperature science that stops your chocolate candy melts from splitting.
- Make-Ahead Magic: You can make these a week in advance and store them in the fridge!
🛒 Ingredients & The “Apple” Guide
You don’t need any special molds to make these look like apples!
- 1 Box (15.25 oz) Vanilla or Yellow Cake Mix: (Plus the eggs, water, and oil to bake it!).
- ⅓ cup Vanilla Frosting: (Store-bought canned frosting works perfectly as the “binder”).
- 2 bags (12 oz each) RED Candy Melts: (Crucial: Do not use dyed white chocolate chips! Candy melts are specifically formulated to dry into a hard, snappy shell).
- Thin Pretzel Sticks: (Broken into small 1/2-inch pieces. These will be the “stems” of your apples!).
- Green Leaf Sprinkles or Green M&M’s: (To create the leaf next to the stem).
- 20 to 25 Paper Cake Pop Sticks.
- A Styrofoam Block: (To hold the cake pops upright while they dry).
🍳 Step-by-Step Masterclass Instructions
Step 1: Bake, Crumble, and Bind
Bake your cake in a 9×13 pan according to the package directions. Let it cool completely. Crumble the entire cake into fine crumbs in a large bowl.
Add the ⅓ cup of vanilla frosting. Use your hands to knead the mixture together until it forms a dough that holds its shape when squeezed.
Step 2: Shape the “Apples” 🍎
Roll the dough into 1-inch balls. To make them look like apples: Use your thumb to press a very slight, gentle indentation into the top center of each ball (where the stem will go later!). Place them on a parchment-lined baking sheet.
Step 3: The “Temperature Shock” Secret (CRUCIAL!) 🛑
Why do cake pops crack? Because people dip freezing cold cake balls into boiling hot chocolate! The sudden temperature change causes the chocolate to shrink rapidly and crack under pressure.
The Bakery Secret: Place your rolled cake balls into the freezer for 15 minutes to firm up. THEN, remove them from the freezer and let them sit on the kitchen counter at room temperature for 10 to 15 minutes BEFORE dipping. You want them firm, but not ice-cold.
Step 4: The “Chocolate Glue” Hack
Melt your red candy melts in a tall, narrow microwave-safe glass. Dip the tip of a paper cake pop stick into the red chocolate, then push it halfway into the bottom of a cake ball. Repeat for all cake pops. Let the “chocolate glue” harden for 2 minutes.
Step 5: Dip and Tap
Dip each cake pop straight down into the melted red chocolate until it covers the cake completely. Pull it straight up. Do NOT swirl! Gently tap your wrist to let the excess chocolate drip off.
Step 6: Add the Stem and Leaf 🌿
While the red chocolate shell is still wet, gently press a small piece of a broken pretzel stick into the indentation at the top of the “apple.” Place a green leaf sprinkle right next to the pretzel.
Stick the pop into your styrofoam block and let the chocolate set completely!
👉 Need a fast weeknight dinner for the first week of school? Try my [30-Minute Unstuffed Peppers Skillet]!
🔒 Storage & Transport Tips
- Refrigerator Storage: Store the finished cake pops in an airtight container in the fridge for up to 1 week. The cold makes the inside incredibly fudgy!
- Transporting to School: If you are packing these in a lunchbox, put them in a small hard plastic container so they don’t get squished by a heavy thermos or books!